MicroVision 100 has tree characteristics that place it at the top of the measuring systems:
- subpixel measurement
- Telecentric optics
- Very easy user interface
The subpixel:
Assume we need to measure the dimension of 20 mm long part in accuracy
of +/-1 micron.
Using a lens with 25 mm (25000 [microns]) Field of view, you can cover the part, Now choosing a camera is needed 2024 X 2024[pixels] is a reasonable camera for the industrial tools but the resolution of the system will be 25000[microns]/2024[pixels] =12 [microns] which is far from the +/-1 [microns] accuracy we need.
Most of our competitors will use higher magnification ( 1 micron per pixel) to get the accuracy but will not see the part in one picture.
Choosing optics with 1 micron per pixel will cover only 2024[pixels] X 1[micron]=2042 microns =2.042 mm, in this magnification we will get the accuracy but will not see the entire part in one picture.
Their solution is to put the camera on stage and to use 2 pictures, the final result is the position on the left image + position on the right image + the distance that the stage was moved:
The disadvantages of this solution:
- More expensive tool
- More complicated tool
- Less accuracy since the position error of the mechanical stage will be added
BROSSH’s solution
- Using a lens with 25 mm (25000 [microns]) Field
- Camera 2014X2024 pixels
- Resulting 12 microns pixel size

How we will achieve the 1 microns accuracy, the answer is SUBPIXEL TECHNOLOGY.
BROSSH engineers have a strong background in microelectronic measurement tools, there has always been a problem of resolution and subpixel technology was necessary in order to get the measurement accuracy.
BROSSH brings the semiconductor measurement technology to their MICRO VISION 100 metrology tool.
SUB PIXELING EXPLANATION
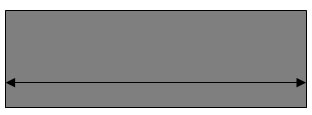
Measurement of the left face:![]()
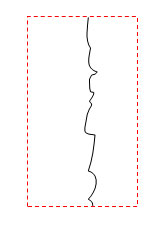
The image edge of the line will never be perfect and the camera has always some noise, The edge will look in the computer memory as the following
The principle is to estimate the best line that will fit the data
Example:
Assume a line that is 100 pixels long.
For each row the software looks for the place in which the line create maximum intensity
![]()
Now we have the maximum level that represents the line, in this stage we fit the Gaussian on near the maximum:
This Gaussian performs the same kind of averaging too.
The Gaussian length is about 50 pixels, if the line length is about 100 rows a number of pixels in this process is 100*50 = 5000 pixels
The gain in this case is square of 5000=71.
This line is an average of the data and according to the theory the resolution gain by a factor of the square of N, where N is the number of pixels in the line.
THE ADVANTAGE
- Less expensive tool
- Less complicated tool
- More accuracy since the position error depend just on the optics and no moving parts
The following is an example of measuring part with 2 [centimeter] length with 11 microns pixel size for 1-micron accuracy.
Telecentric optics
The MicroVision100 uses a telecentric lens that allows measurement of 3D features accurately.
When standard optics are used to image 3-D objects, distant objects will appear smaller than those farther away.
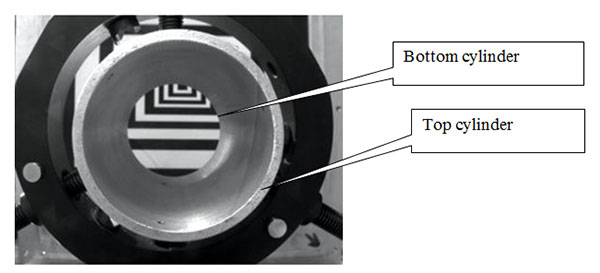
As a consequence, when an object such as a cylindrical cavity is imaged, the top and bottom circular edges appear to be concentric and the inner walls of the cylinder are imaged (common optics behave like human eyes when looking inside a cup or a glass).
However, by using telecentric optics, the bottom edge and inner walls disappear and therefore the telecentric lens gives a 2-D view of a 3-D object, making the machine-vision system work more or less like CAD software.
In the following picture a cylinder was taken with conventional optics, The cylinder top side showing larger diameter than the bottom.

Taking a picture of the same cylinder with telecentric optics show the same diameter for the top and bottom
Easy user interface
The MicroVision100 have the easiest user interface compared to the other systems.
It takes several minutes to set up new inspection recipe, the operator can set up inspection recipe without knowing any computer languages.
We know that every manufacturer says the same but our customers can testify how easy is to setup inspection recipes.

